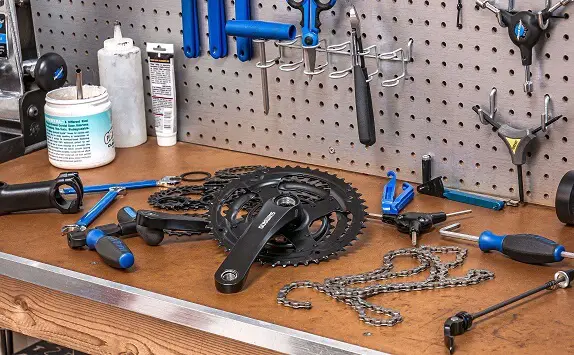
The crankset is an essential component of a bicycle to convert the interchanging motion of the legs of the rider into rotating motion. It is necessary to drive the belt or chain and rear wheel. It contains sprockets aka chainrings attacked to crankarms, arms or cranks along with pedals.
For a smooth and enjoyable cycling experience, it is essential to focus on the function of the crank. The mechanical failures and problems on the bike are investable. Cranks need regular servicing for proper maintenance and fantastic performance.
How To Remove Bike Crank Without Puller
In this guide, we will explain How to Remove Crank Without Puller for bicycles.
#1.Crank Puller
To remove a crank, you will need a special tool known as a crank puller. It contains a series of bolts and nuts and function by dragging the crank from an engaged axle. These bolts and cranks are made of aluminum for stable and lighter performance.
No doubt, a puller can make it easy for you to remove a crank. You can remove it without a puller here is an easy guide how to remove crank without any puller.
#2. Protect Your Hands
In the first step, pay attention to the safety of your hands before removing crank without a puller. It will help you to avoid injuries in your hands. Buy a pair of work gloves for maximum protection and wear them before removing crankset.
Shift gear of your bicycle toward the large cogwheel for protection of your arms and hands. Make sure to keep your adjacent area free from extra stuff, such as liquid or oil. These things can fall on you.
#3. Remove Nut or Bolt
To loosen the crankset, you have to remove nut or bolt. It will make it easy for you to remove a crank without trouble. For this purpose, turn the nut or bolt in a counter-clockwise route. Make sure to do everything slowly because your chain may jump off and hurt your hand.
Remove the caps of the dust in underneath bolt. Moreover, snoop the filaments our or eradicate them by gradually threading a bold, based on your crank arm of your bicycle. Pay attention to the type of crank before removing it.
#4. Remove Washers of Cranks
Now remove washers of the crank available on the crankset. These are metal discs with middle holes. They are situated underneath the threads nuts and bolts. The washers back the movements of wheels in a direction with the help of pointed curves of the lever. Use a spanner tool or a bolt to lose or remove them.
#5. Inspect Crank Bolts
Now, you have to inspect crank bolts thoroughly. Try to use the best tool to remove crank arm without puller. Use CCP-22 or CWP-7 that has a thin and small tip if you want to remove a crankset M8 bolt. For M12 and M14 bolts, you will need CCP-44 or CWP-7.
#6. Turn the Threaded Puller
Gently turn the threaded coupler of a puller, until you start feeling the fitting tool hex and bold recessed already out of the tool. It should not cross the filament and avoid damaging the surface.
Make sure to engage 22 mm completely and thread into its arms directly. Use a spanner or a screwdriver tool to manage this efficiently.
#7. Thread the Spindle Driver
Directly thread the spindle driver of the puller in the arms of crank after turning the coupler of thread completely. Carefully manage this task because you have to use the raw power of your arm. Even a small carelessness can hurt you.
Now directly insert a spindle drive in a designated slot. Gently turn a driver into a counter-clockwise route to make cranks fully taut. Test the tautness of crank several times to ensure it is not loose. Remember, a loose driver may damage the arms of a crank and make other components lose.
#8. Move the Spindle
It is the right time to turn the shaft clockwise once you have entirely tightened it. You have to ensure that arms of the crank are fully disengaged. Carefully do this step without any rush. You have to do things slowly to avoid damages to threads, bold and square taper crankset or you will injure yourself.
#9. Unthread Crank System
Now you have to unthread the arm puller crank tool from the cranks. Slowly unthread it away from the crank. In this step, your knuckles may hit the sides of a crank. Replicate this process on the remaining cranks. Carefully, test your bicycle if every component is working correctly, particularly the arm of the crank.
#10. Installation of Bike Cranks
Pop in a crank directly in the spindle. You can put the washers around an axle before installing it. Now push the right side of the crankset in the spindle and wrap a chain around the chainring. It must be perfectly tucked on the crankset.
Gradually slide the crank in left directly via the spindle. Shove the crank arm in left into the axle and use one rubber mallet to tap it and push into its right place gently. Screw a crank tightly in the socket with the use of an Allen key tool. Place the crank bolt again in their respective sockets. Screw the crank bolt the back afterwards.
Carefully double-check a compression cap and ensure that all pinch bolts are tight. Tauten the bolt and cap along with recommended torque with the use of one torque wrench. It may be almost 5-newton meters. Now, carefully constrict your bold and crank to almost 15-newton meters.
Screw all the pedals on the arms of a crank. Put one pedal on every socket and move it counter-clockwise. Replicate this procedure on another side. Double-check the bolts and nuts afterward.
Related: How to Change Bottom Bracket Without Tool
CRANKSET MAINTENANCE TIPS
To inspect crankarms, wiggle and grab them away and toward your frame. They must not play for your safety and smooth ride. Once you detect slop, find out the movement of cranks. They must move on the axle. Here are some simple maintenance tips for the crankset.
Whole Thing is Shaking or Moving
During an inspection, if you notice the entire crankset is moving and you are required to choose a sealed-cartridge base bracket, the BB becomes the main toast. Work on the retaining ring or cup because these may become loose. The axle should spin without efforts or with hydraulic resistance. If it sounds or feels dry, you have to replace it correctly.
With the use of a cup-and-cone bracket, try to remove it through an overhaul before spring for one new BB. You have to remove the lockring located at the left side with the use of a particular locking-spanner tool and turn the flexible cup counter-clockwise to eliminate it.
For this reason, you need a particular spanner. Remove the dust sleeve, bearing and axle (if available). Swap all the comportments, regrease them before their reinstallation.
Cranks on the Axle
Carefully check if cranks are on the axle because it is an expensive problem. You will need a hex wrench to snug the cranks. Make sure to arrange thin-wallet socket or particular installation and removal tool based on the type of crankarm. Check the kind of crankarm before selecting a tool.
If you are checking for slop, the crankarm or axle interface is deformed or bent. In this situation, it is crucial to replace the crankarms. You have to snug up bolts chainring with the use of a 5mm wrench. Carefully check the teeth of chainrings because these may be bent or worn. Remember, the work teeth may look sharp and thin.
Consistent use of a worn chain can increase the chance of wear and tear in the remaining cassette and rings quickly. If you want to increase the life of your chain, consider inner gear pivot bikes. Internal gears can protect your chain from potential damage, mud and dust.
Bent teeth may straighten back with some efforts. For this purpose, you have to snug a flexible wrench against the flat section of the teeth and bend them back. Your chainrings are made of aluminum, which means you will not get the opportunity to fiddle with a tooth.
Remember, you will get only one chance to fix them because teeth can snap off at the time of readjustment. To improve the condition of the crankset, you have to follow this maintenance routine.
- Check crank bolts once in a month and after three rides.
- After 1,000 miles, you have to evaluate the chainring.
- Carefully evaluate the BB slop each month
COMMON ISSUES IN CRANK ARMS
Sometimes, crank arms become loose, and you have to make them tight. To make crank arms tight, you have to move its bolts in a clockwise direction. At the time of pedaling, you have to turn it in a clockwise direction. The non-drive side will turn in a different direction.
Noisy Cranks
The noise problem is common in mountain bikes. The noise comes from the arms of cranks. Sometimes, you will find it difficult to move your bicycle. Pedals can be loose, and clay may work between the base bracket and crank.
You can fix this issue with proper torquing and cleaning of the crank arm. It is not detrimental for the rider, but you may find it annoying. For this reason, proper tightening and cleaning of the crank arm can be the right solution.
Chain is Stuck
Sometimes, chain stuck while pedaling on the ring and jams or locks up over the top of chainstay. You have to check chainrings for wear, and there must be a perfect semi-circle between symmetrical teeth. Swap ring with a broadened circle between dolphin-fin teeth, chain and low teeth.
Evaluate your chain for bent and wear links. Immediately remove the bad links. If the chain is stiff and rusty, feel free to replace it or use a lubricant. Sometimes, the chain becomes cruddy with dust or mud. Extra lubricant can build up dust. If chain and rings look fine, clean this chain and apply some lube to the chain.
A sudden sound of scrunch or chain slip may cause a jerk in pedaling. You have to pedal hard in numerous cases. It may increase the chances of chain stretch and worn front chainrings. If a chain is not worn, replace the problematic ring. Remove all bent links from your chain because it is dangerous for you.
If cogs, rings and chain look fine, remove freewheel and cassette to check springs, slots and pins. Clunk with every pedal stroke means a loos clunk, or it is attached to base bracket. Make it tight to fix lots of things. Sometimes, attachment of crank look work, it will be great to replace this attachment.
Feel free to use thread-locker on a bolt. Check if the pedal cage is cracked or loose. If your bike is skipping around in gears, quickly look for weeds in a cassette or around derailleur.
Check hanger of derailleur because it must be vertical to the frame of a bike without any twist. Evaluate the cassette cogs for weeds, wood chunks and pebbles between teeth. These things can make your rides dangerous. If you are facing any difficulty while riding your bike, you have to fix possible issues.
Related: Are Organic Brake Pads Any Good?
Replacement for Crankarm
If you are facing common crank issues, you will need the right tools to manage maintenance. Research your crankset and bike to find out the required toque on the arms of a crank. It is crucial to make them tight, but avoid making them ratchet.
It may put extra pressure on the base of the bracket and the terminal may be the primary culprit. If you want to find out possible issues, try to check the manual of your bike. Sometimes, manuals are available online for your assistance.
Feel free to replace a faulty crank arm because different brands are available in the market. Some famous names are Surly, SRAM, Shimano, Race Face, and Cane Creek. You can find them in different materials, such as chromyl steel, carbon fiber, titanium, and aluminum alloy. A carbon fiber crank is extremely expensive.
Size of these arms is the same with numerous brands. If your cycle has its actual components, you could look up the specifications in the paperwork on the bike. For the right sizing, check the website of the brand.
Frequently Asked Questions
How do I remove a crank arm?
Liked 1 Time in 1 Post Using a set of pry bars would work. I’ve even taken crank arms off with a big screwdriver and a block of wood.
What is the cheapest set of replacement crank pullers?
Today, Nashbar will sell you their house brand crank puller for $7.39 with free shipping.
How do you remove cranks?
My only option was brute force of some kind.
What is the best way to use a crank puller?
Remember that most modern square tapers are generic and with reasonable certainty, any generic puller will do the job.
Can You Remove a Bike Crank Without A Puller?
Removing the bike crank without a crank puller is possible but very difficult and near impossible to do without damaging the crack in some capacity.
How do I remove the dust caps?
You can remove the dust caps if the bolt is underneath them.
What tools do you need to remove the crank arm and bolts?
Use a CWP-7 or CCP-22, for an M8 crank bolt and CWP-7 or CCP-44 for bigger M14 and M12 bolts.
I am very grateful to you because last few days I am seeking how to remove cranks without a crank puller. When I found your article it decreases my pressure. Now I kicked this out and can do it very easily. Your words are very easy to understand.
Anyway, I am a newbie bike rider. Hope one day I could be a good rider.
Thank you so much for shear this helpful info.
Hey Raymond P Vaughn, It’s my pleasure when I see someone benefited by reading our bike tips.